NiFiServer实际意义上来讲就是一个Jetty,也就是一个web容器,启动过程到此地方的时候,也就是开始启动它的web模块了,这里加载流程比较复杂,但很清晰.主要干了几件事情:
- 初始化JettyServer
- 加载所有FlowFileProcessor,FlowFileComparator,reportingtask类
- 生成Nifi中的各种文档
- 启动jetty,并配置Filter
一、初始化JettyServer
工程中对Jetty做了一次包装和抽象,类图如下:
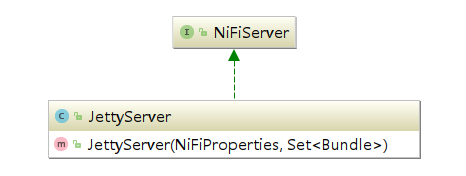
在主启动流程中,可以看到使用framework的classloader去反射的JettyServer类,代码如下:
 nifiServer = (NiFiServer) jettyConstructor.newInstance(properties, narBundles);
 nifiServer.setExtensionMapping(extensionMapping);
 nifiServer.setBundles(systemBundle, narBundles);
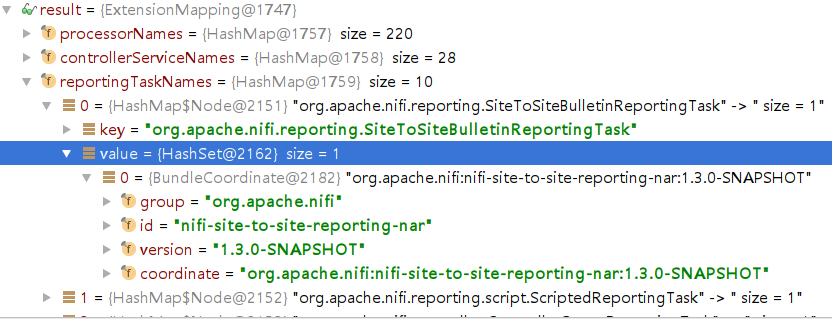
其实很好明白,主要是传递了之前解压nar包时候拼凑的数据结构和程序的所有配置。ExtensionMapping的结构如下:
Jetty的构造方法干了几件事情:
-
配置Jetty的端口和链接地址 判断配置文件中的nifi.web.http.network.interface.*是否为空,如果为空,则使用所有的网卡地址。否则使用用户配置的网络地址和端口号。
- 加载工程中的所有war包
软件首先扫描解压的nar路径,然后扫描每个nar中的META-INF/bundled-dependencies目录中,以*.war结尾的文件,war包分为几类,如下:
 File webUiWar = null;
 File webApiWar = null;
 File webErrorWar = null;
 File webDocsWar = null;
 File webContentViewerWar = null;
 List<File> otherWars = new ArrayList<>();
 for (File war : warToBundleLookup.keySet()) {
 if (war.getName().toLowerCase().startsWith("nifi-web-api")) {
     webApiWar = war;
 } else if (war.getName().toLowerCase().startsWith("nifi-web-error")) {
     webErrorWar = war;
 } else if (war.getName().toLowerCase().startsWith("nifi-web-docs")) {
     webDocsWar = war;
 } else if (war.getName().toLowerCase().startsWith("nifi-web-content-viewer")) {
     webContentViewerWar = war;
 } else if (war.getName().toLowerCase().startsWith("nifi-web")) {
     webUiWar = war;
 } else {
     otherWars.add(war);
 }
 }
其中,otherwars找到了4个,并使用了单独的加载方式:

- 读取每个war包的扩展类型,扩展类型包含4个大类:
private void identifyUiExtensionsForComponents(final Map<UiExtensionType, List<String>> uiExtensions, final File warFile) { try (final JarFile jarFile = new JarFile(warFile)) { // locate the ui extensions readUiExtensions(uiExtensions, UiExtensionType.ContentViewer, jarFile, jarFile.getJarEntry("META-INF/nifi-content-viewer")); readUiExtensions(uiExtensions, UiExtensionType.ProcessorConfiguration, jarFile, jarFile.getJarEntry("META-INF/nifi-processor-configuration")); readUiExtensions(uiExtensions, UiExtensionType.ControllerServiceConfiguration, jarFile, jarFile.getJarEntry("META-INF/nifi-controller-service-configuration")); readUiExtensions(uiExtensions, UiExtensionType.ReportingTaskConfiguration, jarFile, jarFile.getJarEntry("META-INF/nifi-reporting-task-configuration")); } catch (IOException ioe) { logger.warn(String.format("Unable to inspect %s for a UI extensions.", warFile)); } } -
执行loadwar方法,其实就是创建一个WebAppContext,设置请求地址为war包的名字,然后新建一个WebAppClassLoader,最后根据war包的扩展类型不同,放入到不同的结构中。
- 最后使用loadwar方法加载所有的标准war:
 // load the web ui app
 handlers.addHandler(loadWar(webUiWar, "/nifi", frameworkClassLoader));

 // load the web api app
 webApiContext = loadWar(webApiWar, "/nifi-api", frameworkClassLoader);
 handlers.addHandler(webApiContext);

 // load the content viewer app
 webContentViewerContext = loadWar(webContentViewerWar, "/nifi-content-viewer", frameworkClassLoader);
 webContentViewerContext.getInitParams().putAll(mimeMappings);
 handlers.addHandler(webContentViewerContext);

 // create a web app for the docs
 final String docsContextPath = "/nifi-docs";

 // load the documentation war
 webDocsContext = loadWar(webDocsWar, docsContextPath, frameworkClassLoader);

 // overlay the actual documentation
 final ContextHandlerCollection documentationHandlers = new ContextHandlerCollection();
 documentationHandlers.addHandler(createDocsWebApp(docsContextPath));
 documentationHandlers.addHandler(webDocsContext);
 handlers.addHandler(documentationHandlers);

 // load the web error app
 handlers.addHandler(loadWar(webErrorWar, "/", frameworkClassLoader));

 // deploy the web apps
 server.setHandler(gzip(handlers));
二、加载所有扩展类
执行完成上述的过程后,代码真正运行到了nifiServer.start()方法。程序首先加载所有扩展类,分两部分做加载:
-
系统bundle的加载
-
其他所有71个narBundles的加载 加载所是用的逻辑是一致的,唯一不同的区别在于,系统bundle不用切换classloader来做。
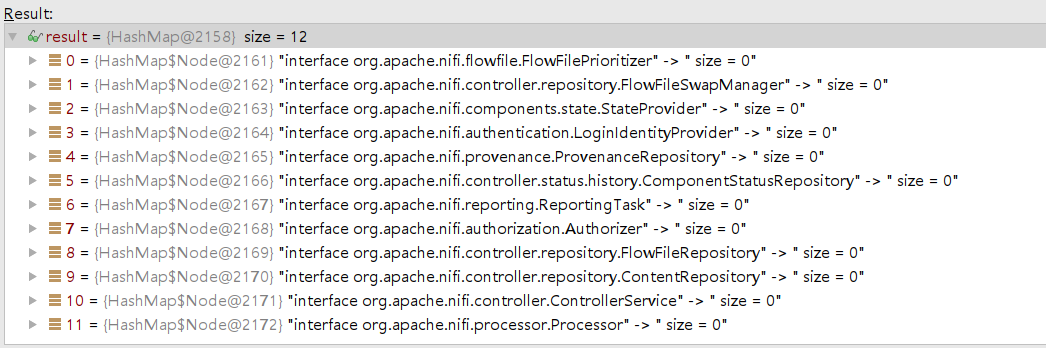
  private static void loadExtensions(final Bundle bundle) {
     for (final Map.Entry<Class, Set<Class>> entry : definitionMap.entrySet()) {
         final boolean isControllerService = ControllerService.class.equals(entry.getKey());
         final boolean isProcessor = Processor.class.equals(entry.getKey());
         final boolean isReportingTask = ReportingTask.class.equals(entry.getKey());

         final ServiceLoader<?> serviceLoader = ServiceLoader.load(entry.getKey(), bundle.getClassLoader());
         for (final Object o : serviceLoader) {
             // create a cache of temp ConfigurableComponent instances, the initialize here has to happen before the checks below
             if ((isControllerService || isProcessor || isReportingTask) && o instanceof ConfigurableComponent) {
                 final ConfigurableComponent configurableComponent = (ConfigurableComponent) o;
                 initializeTempComponent(configurableComponent);

                 final String cacheKey = getClassBundleKey(o.getClass().getCanonicalName(), bundle.getBundleDetails().getCoordinate());
                 tempComponentLookup.put(cacheKey, (ConfigurableComponent)o);
             }

             // only consider extensions discovered directly in this bundle
             boolean registerExtension = bundle.getClassLoader().equals(o.getClass().getClassLoader());

             if (registerExtension) {
                 final Class extensionType = o.getClass();
                 if (isControllerService && !checkControllerServiceEligibility(extensionType)) {
                     registerExtension = false;
                     logger.error(String.format(
                             "Skipping Controller Service %s because it is bundled with its supporting APIs and requires instance class loading.", extensionType.getName()));
                 }

                 final boolean canReferenceControllerService = (isControllerService || isProcessor || isReportingTask) && o instanceof ConfigurableComponent;
                 if (canReferenceControllerService && !checkControllerServiceReferenceEligibility((ConfigurableComponent) o, bundle.getClassLoader())) {
                     registerExtension = false;
                     logger.error(String.format(
                             "Skipping component %s because it is bundled with its referenced Controller Service APIs and requires instance class loading.", extensionType.getName()));
                 }

                 if (registerExtension) {
                     registerServiceClass(o.getClass(), classNameBundleLookup, bundle, entry.getValue());
                 }
             }

         }

         classLoaderBundleLookup.put(bundle.getClassLoader(), bundle);
     }
 }
definitionMap中定义了12种类型:
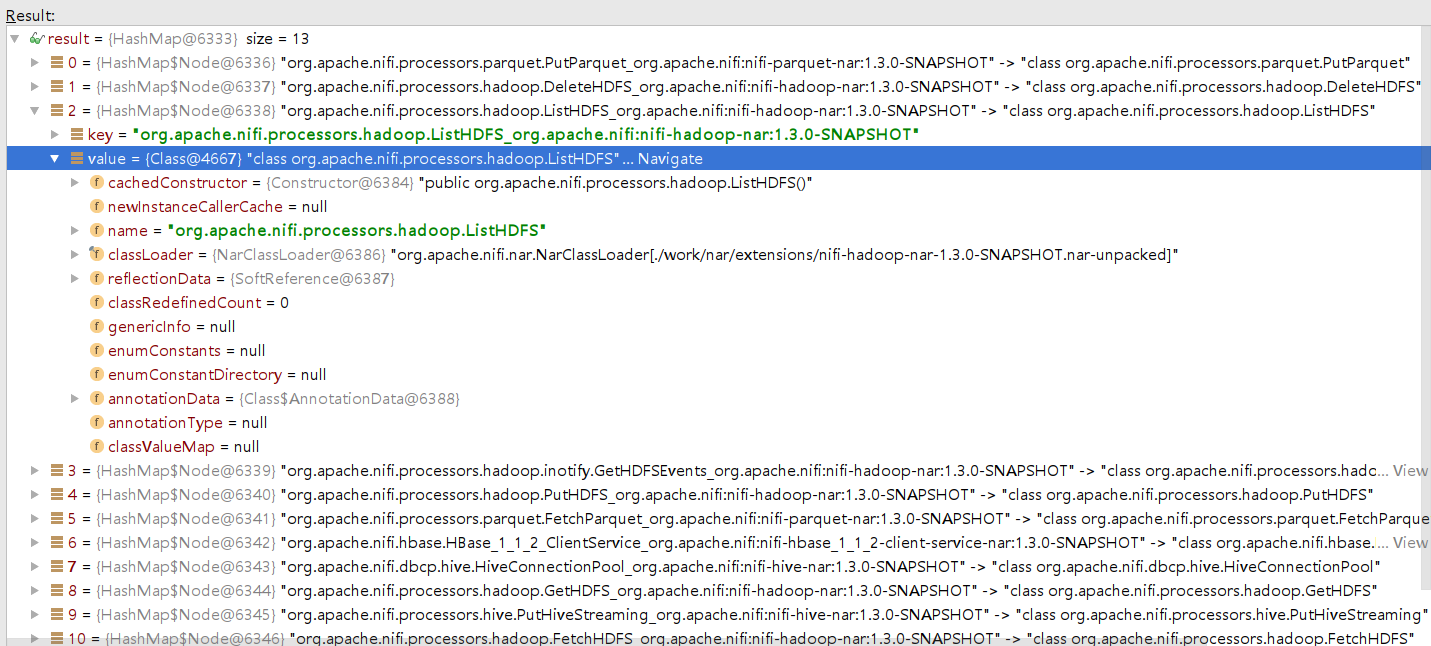
 代码比较好理解,首先,根据12种interface类型,加载起所有的子类,然后遍历子类判断是需要初始化的类还是直接加载的类,需要初始化的,先执行初始化方法,然后把这些类拼装到requiresInstanceClassLoading结构中:
 至此,加载完成。
三、文档的生成
-
首先读取配置文件中的nifi.documentation.working.directory配置项,作为生成文档的工作根目录,默认为:./work/docs/components。
-
根据不同的分类进行解压:
  public static void generate(final NiFiProperties properties, final ExtensionMapping extensionMapping) {
     final File explodedNiFiDocsDir = properties.getComponentDocumentationWorkingDirectory();

     logger.debug("Generating documentation for: " + extensionMapping.size() + " components in: " + explodedNiFiDocsDir);

     documentConfigurableComponent(ExtensionManager.getExtensions(Processor.class), explodedNiFiDocsDir);
     documentConfigurableComponent(ExtensionManager.getExtensions(ControllerService.class), explodedNiFiDocsDir);
     documentConfigurableComponent(ExtensionManager.getExtensions(ReportingTask.class), explodedNiFiDocsDir);
 }
具体的生成细节不做具体研究,是把ConfigurableComponent这个结构写成一个index.html文件,以kafka的举例,内容如下:
 <!DOCTYPE html>
 <html lang="en">
 <!--
   Licensed to the Apache Software Foundation (ASF) under one or more
   contributor license agreements.  See the NOTICE file distributed with
   this work for additional information regarding copyright ownership.
   The ASF licenses this file to You under the Apache License, Version 2.0
   (the "License"); you may not use this file except in compliance with
   the License.  You may obtain a copy of the License at
       http://www.apache.org/licenses/LICENSE-2.0
   Unless required by applicable law or agreed to in writing, software
   distributed under the License is distributed on an "AS IS" BASIS,
   WITHOUT WARRANTIES OR CONDITIONS OF ANY KIND, either express or implied.
   See the License for the specific language governing permissions and
   limitations under the License.
 -->
 <head>
     <meta charset="utf-8" />
     <title>ConsumeKafka</title>
     <link rel="stylesheet" href="/nifi-docs/css/component-usage.css" type="text/css" />
 </head>

 <body>
     <!-- Processor Documentation ================================================== -->
     <h2>Description:</h2>
     <p>
         This Processor polls <a href="http://kafka.apache.org/">Apache Kafka</a>
         for data using KafkaConsumer API available with Kafka 0.10.x. When a message is received
         from Kafka, this Processor emits a FlowFile where the content of the FlowFile is the value
         of the Kafka message.
     </p>
 </body>
 </html>
四、Jetty的启动和Filter配置
-
这里执行了server.start()。也就是真正的启动了jetty,熟悉jetty的知道,这里启动之后,开始初始化web工程,加载web.xml然后引导起之前加载进来的war包。具体的war包加载流程不在本篇详述。
-
启动jetty使用了同线程阻塞等待,等待完成之后,检查了一次所有之前加载的war包的WebAppContext是否在启动过程中出现了异常,如果有异常,直接退出jvm。
-
向每个的war包的/*路径添加filter,类为:org.springframework.web.filter.DelegatingFilterProxy
至此,整个web模块启动完成,接下来就是war包里的具体启动流程,在下章详述。。